
Google provides website owners a set of tools and guidelines to help monitor and improve site performance.
One of those tools is called Google Search Console.
Using the features will allow Google to better find your content, provide you reports about the phrases that are bringing traffic to your site, and let you know if there are certain problems with your site.
Some people have spread the myth that telling Google about your site is a bad thing.
It’s NOT. Google wants to help website owners build strong sites.
As long as you don’t plan on violating their guidelines (and you shouldn’t) then you WANT the information they’re going to share with you about your site!
I find it an invaluable tool.
To use Search Console you need to:
- Have a Google account
- Verify ownership of your site
- Submit your website’s XML sitemap
We’ll cover all of those steps in this post.
Verifying Site Ownership
The Yoast SEO plugin will help
Log into Google Webmaster Tools https://www.google.com/webmasters. You can use an existing Google account or create a new one.
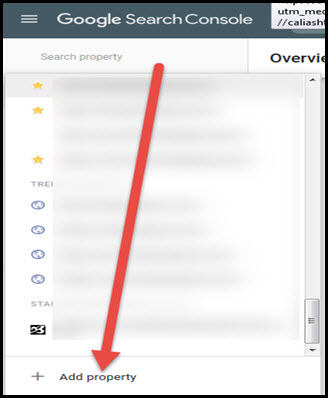
Click the drop down arrow next to your site list drop down box (if this is your first site you won’t see a site name but should see a drop down arrow or list of dashboard options):
Scroll down and click the Add Property option:
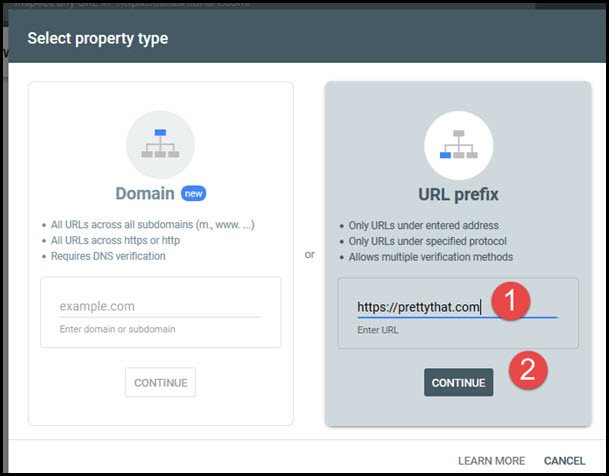
Select the URL prefix method, copy the exact URL address for your site’s home page, paste it into the URL field and then click the Continue button:
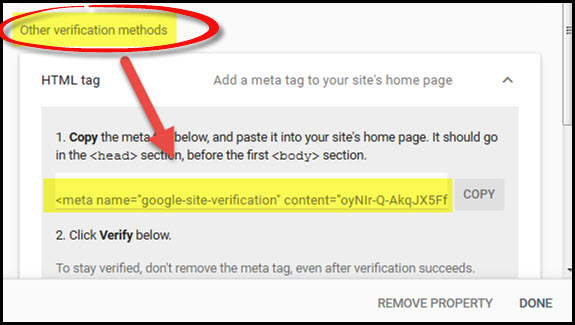
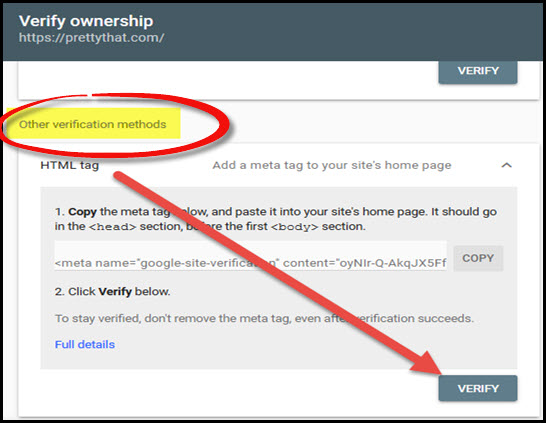
Click the HTML Tag option in the OTHER VERIFICATION METHODS section:
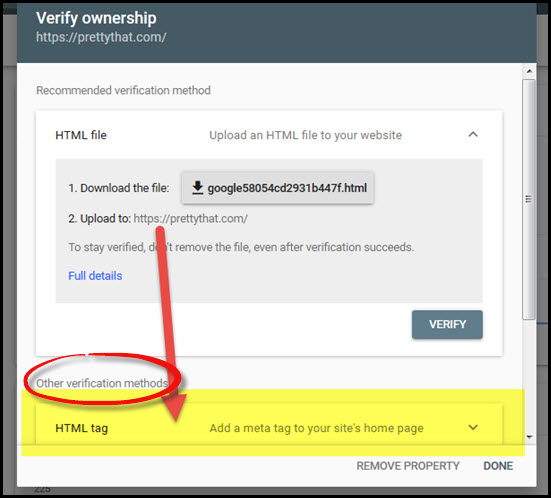
You might need to scroll down to see the code. Click the COPY button for the meta code field:
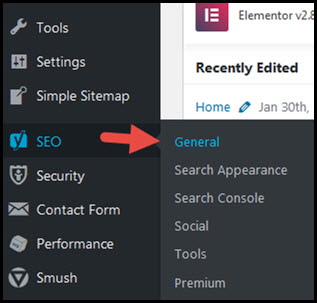
Log into your WordPress dashboard.
If you’ve followed the rest of the steps in this post series you’ve already installed the Yoast SEO plugin. If not, you’ll need to do so now.
Go to SEO/General in WordPress:
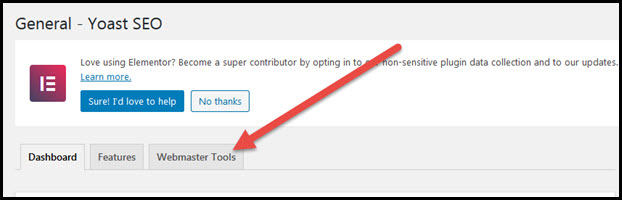
Click on the Webmaster Tools tab:
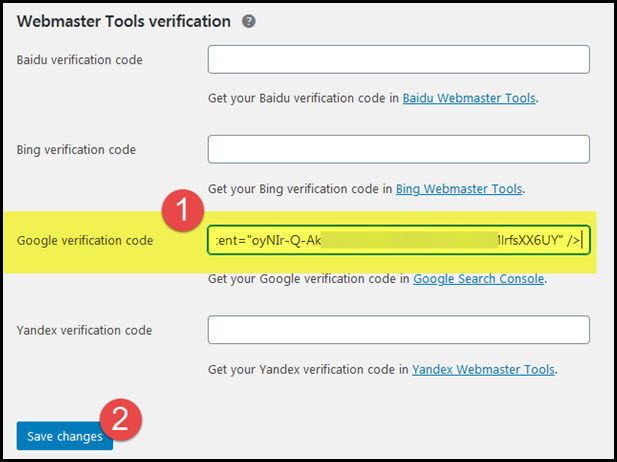
Paste the code copied from Google Search Console into the Google Verification Code field and then click the Save Changes button:
Go back to Google Webmaster Tools and click the Verify button – NOTE: make sure to click the Verify button that matches your chosen verification method:
You should see an Ownership Verified message:
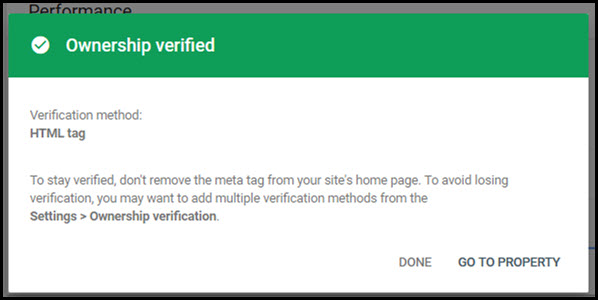
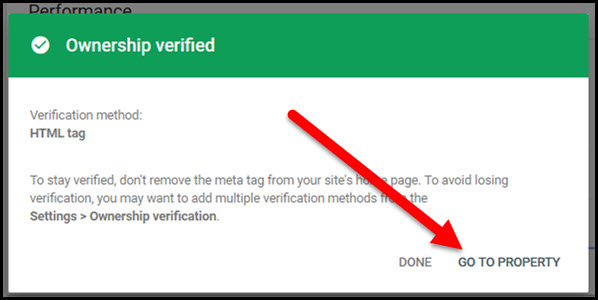
Click the Go To Property link:
Submit Your XML Sitemap
Help Google find your site
There are two kinds of sitemaps – an HTML sitemap and an XML version. In a previous post I had you create an HTML Sitemap page for your site.
This time, you’re going to use your XML sitemap. That’s the version Google can read best.
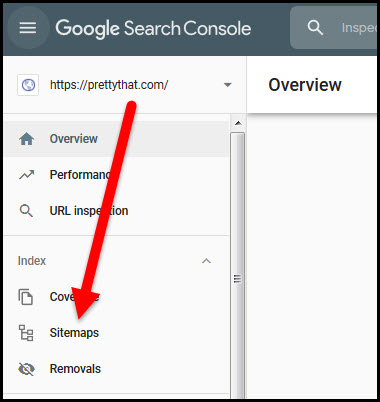
In your Google Search Console dashboard click the Sitemaps tab:
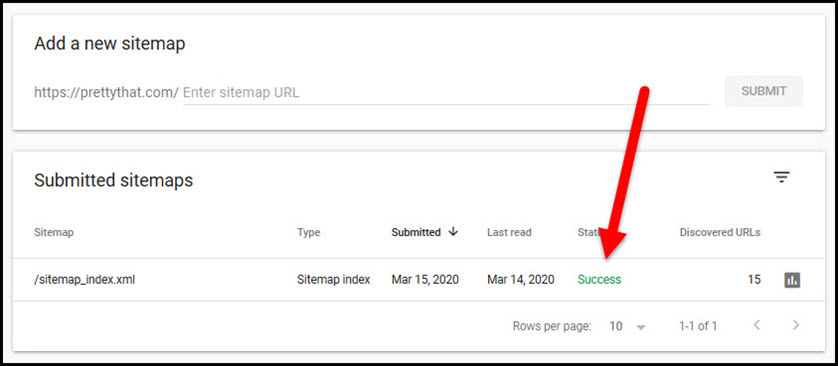
Enter sitemap_index.xml in the sitemap URL field and click the Submit button:

You should see your sitemap has been successfully submitted:
You can learn more about how to use Google Search Console to help you manage your site here: Using Google Search Console.
Just a couple of small steps to go! Next, you want to create Categories for the posts you’ll soon publish on your site.