

WordPress is an excellent, flexible blogging platform for those who own their own domains.
There are numerous themes available to change the look of your WordPress site.
A theme is like a “skin” you put on your phone. The theme controls the layout, fonts, font sizes, and colors used in your website.
By default, WordPress loads with their Twenty Twenty theme. You can change the theme to something else and there are plenty of free themes available.
You can install a new, free theme from right inside your WordPress dashboard which makes things nice and simple.
Not all themes are created equal, though. If the creator of the theme doesn’t know how to code the theme with strong on-page search engine optimization you could end up choosing a theme that hurts your site’s rankings in search engines rather than helps.
How to Check the Theme’s SEO
Choose a strong foundation
There are a few, quick things you can check on the demo page of any theme to see if the on-page SEO is acceptable.
Go to WordPress Themes to see the most popular free themes.
Scroll through the theme options.
Good themes for beginning bloggers include:
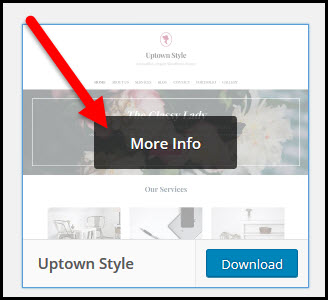
When you find one that looks appealing hover over the theme image so you see the More Info button:
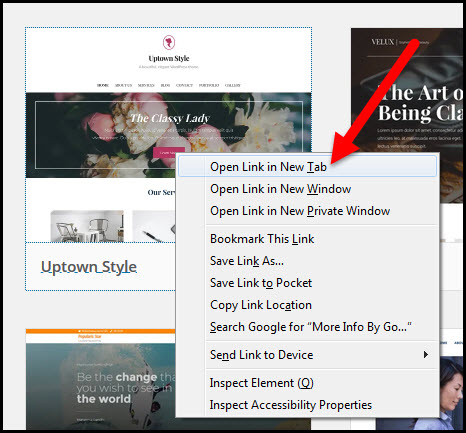
Right-click on the More Info button and choose to open the link in a new tab of your browser (this way you’ll still have the full list of themes open in the first tab):
Look at the theme’s ratings on the right side of the screen:
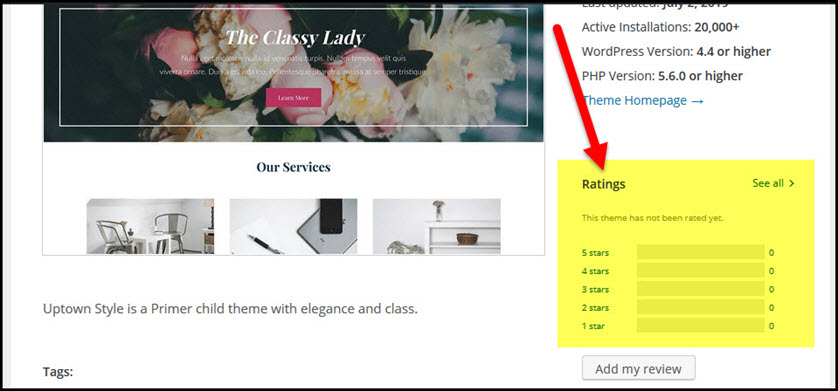
A theme without ratings may be acceptable but skip any that have a rating less than 4 stars.
Next, look at the theme’s description under the image:

Make sure you’re comfortable with the description and features.

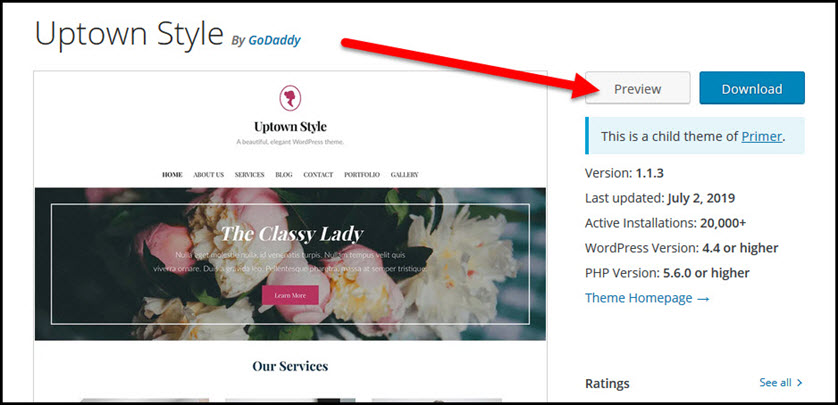
Click the Preview button towards the upper right of the screen to check the theme’s appearance:
Look at where the navigation menu is positioned, the font choice, the font size, the position and size of the header image, the position of a sidebar, the appearance and option in the footer (bottom) of the layout, and whether or not there is a logo option (if that’s important to you).
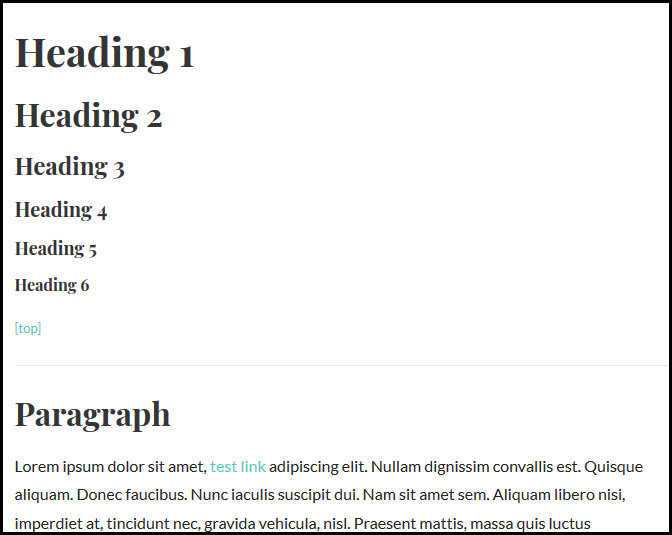
Click on the Elements post title in the demo:
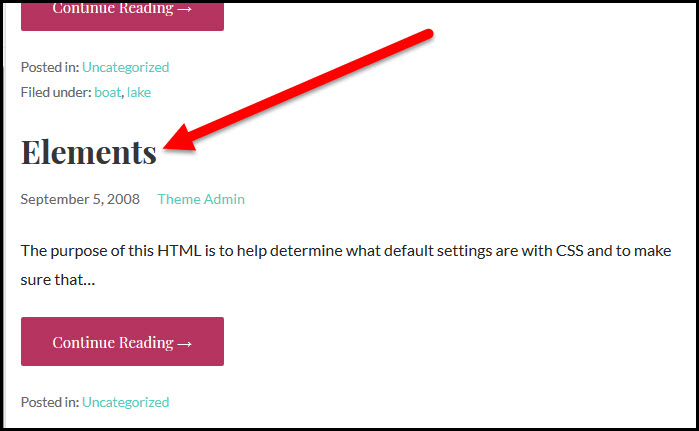
Scroll through the Elements post to get an idea of how different heading sizes will look, what text will look like in a post, how bullet lists are formatted and more:
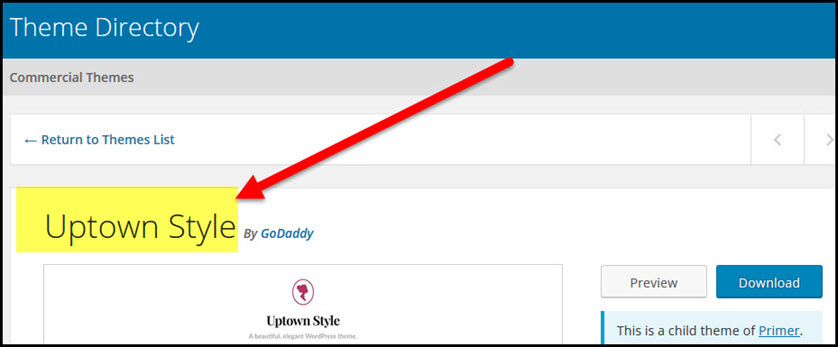
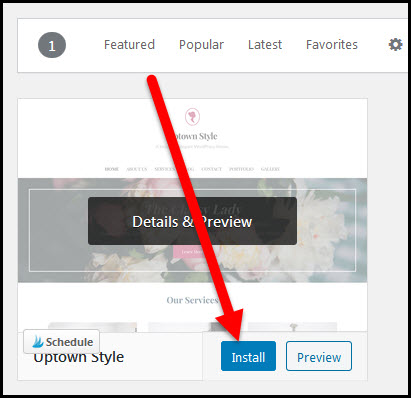
When you find a theme you like make a note of the name of that theme:
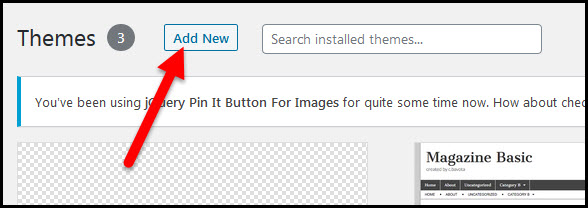
Back in your WordPress dashboard go to Appearance/Themes:

Click the Add New button towards the top of the screen:
Enter the name of the theme you found in the search field:

When you see the theme hover over the name and click the Install button (installing and activating a new theme will not erase any posts or pages you’ve already published on your site):
Once the theme has loaded click the Activate button:
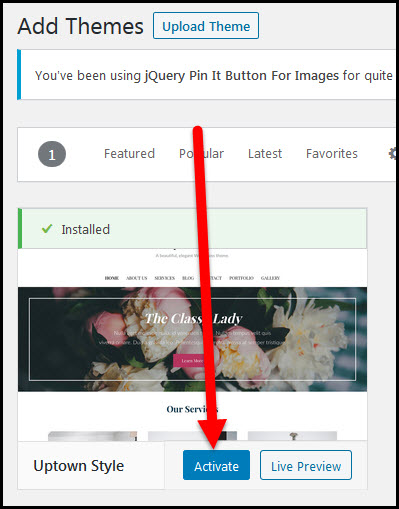
Bring up your site’s home page in a new tab of your browser and you should see the new theme has been applied.
Don’t freak out if it doesn’t look as pretty or flashy as the demo!
Theme demos have already been through the customization steps to add images, change the layout, and have some example content.
As long as you liked the look of the demo your site will eventually look similar as you complete those same steps.
More important at this stage is that you check that the theme is handling titles in a way that will help your site do as well s possible in Google search results.
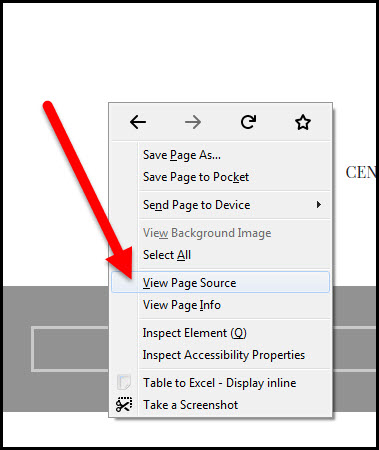
Right-click on a blank area of your site’s home page (not over an image) and choose the View Page Source option (may be called View Source):
SEO experts recommend that the home page of your site have the site name wrapped in <h1> tags AND that each page have only ONE <h1> tag so you want to check that your theme is handling this properly.
Use your browser’s find tool (Edit/Find) to search for <h1 in the source code:
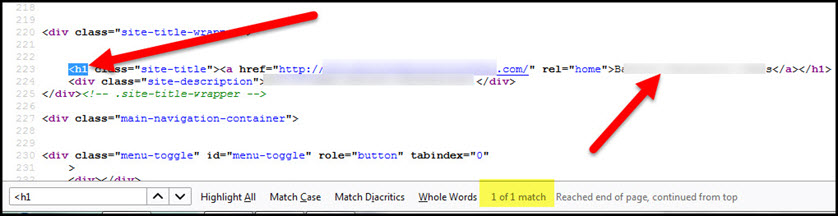
In the image above I can see that the site title has an <h1 before it and the find tool shows me it only exists one time which is great.
Next, on inner posts and pages (meaning NOT the home page) you should have the post or page title wrapped in <h1 tags, and there should still only be ONE <h1 tag.
Click on the link for a published post or page on your site (like your Privacy Policy page).
Right-click on a blank section of the page (not on an image) and choose the View Page Source option again.
Use your browser’s find tool (Edit/Find) to search for <h1 in the source code:
Make sure the title of the page or post has an <h1 before it and that there is only one <h1 in the code:

In the image above we can see that the page title (Privacy Policy) does have an <h1 tag and that there is only one <h1 tag in the code for that page.
If the theme you chose has no <h1 tags or more than one per page find a new theme to install on your site and run this test again until you find a theme that meets those minimum SEO requirements.
Your site will do much better in Google as a result.
Delete Unused Themes
Keep your site clean
During the process of finding a theme you may have installed several to test.
Keeping those theme files on your site won’t hurt other than that they take up space on your server so it’s worth deleting them to keep your site files clean.
Some themes are child versions of a parent theme. In that case you do need to KEEP both the child theme and the parent theme.
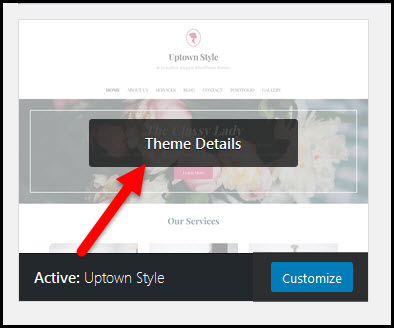
You can tell if your chosen theme is a child theme by going to Appearance/Themes in your WordPress dashboard.
Hover over the name of your active theme and click the Theme Details button:
Look for a notation about your theme being a child of a parent theme:
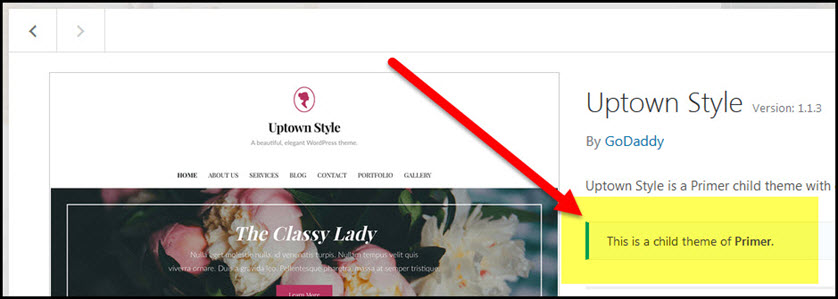
If your theme is a child theme you MUST keep BOTH the child theme AND the parent theme on your site.
To delete unused themes:
Go to Appearance/Themes in your WordPress dashboard.
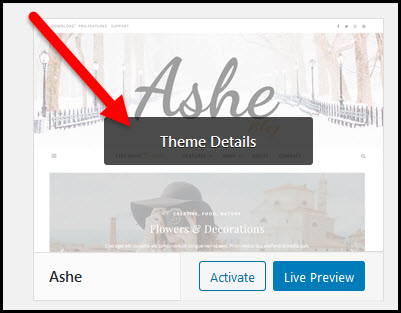
Hover over an unused theme (one that is NOT active on your blog and not the parent of an active theme) and click on the Theme Details button:
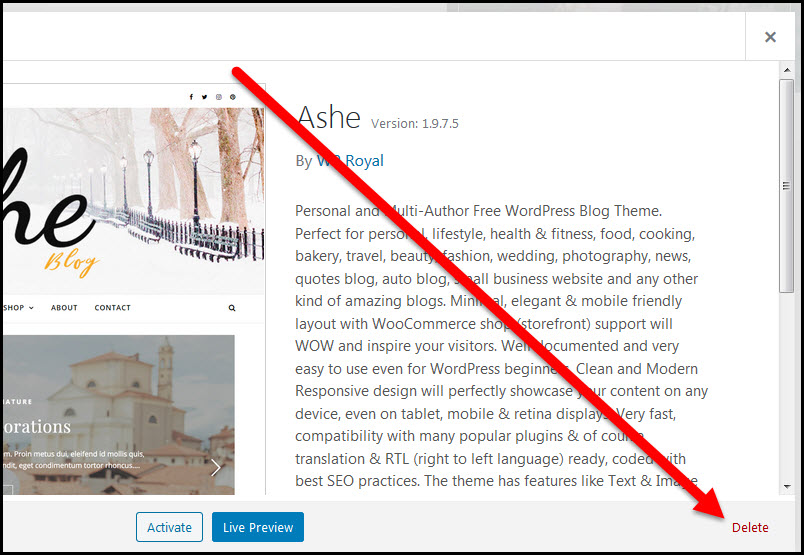
When the theme details come up click the Delete button in the lower right corner:
Repeat those steps for all unused themes except the Twenty Twenty theme. Leaving the unused Twenty Twenty theme files on your site makes it easier to install a backup theme should you run into issues with your chosen theme at any point in the future.
Customize the Theme Appearance
Make it yours!
Each theme provides some amount of customization.
Some themes have very complex customization screens while others are simple and self-explanatory.
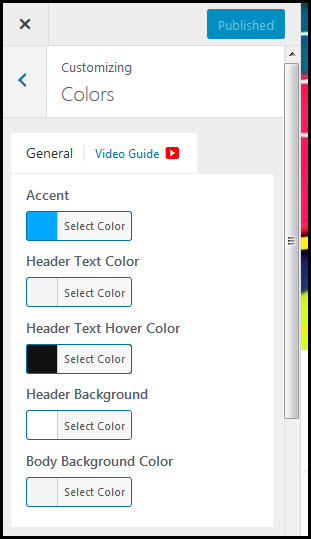
Your theme may allow you to choose the overall color scheme for your site, add a custom header image, add a logo and choose the position of the sidebar.
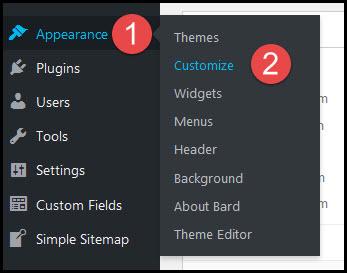
To customize your theme go to Appearance/Customize in your WordPress dashboard:
The WordPress Customizer screen shows a set of tabs on the left sidebar. Each tab presents a set of options for your theme:
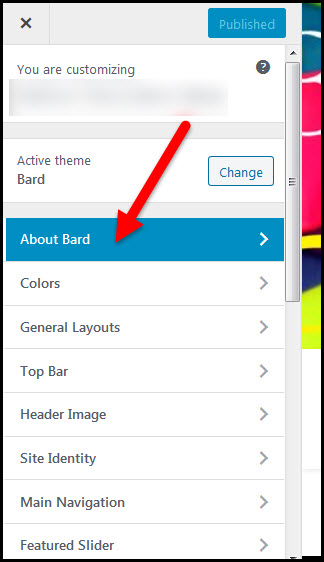
The tabs you see may be different based on the theme you installed.
Click on any one of the tabs and work through the options for that tab:
When you’ve finished your choices for that tab click the back button in the Customizer screen:
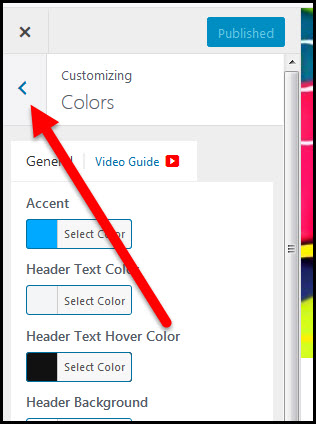
Click on the next tab and work through the available options.
Continue working through each tab until you’re done customizing the appearance of your site. (You can skip the Widgets tab as I’ll cover that in another post. If you don’t know how to create a header image for your site you can also skip that for now. I’ll cover that in a separate post, as well.)
When you’ve finished selecting all of your options click the Publish button:
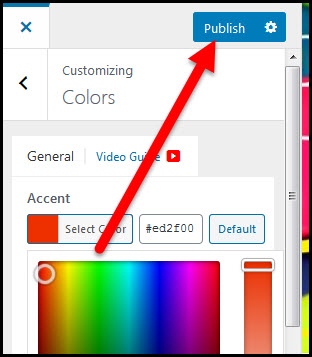
Click the x to close the Customizer screen and return to your WordPress dashboard:
Check the live view of your site. If there is anything you’d like to change you can go back to Appearance/Customize and make additional changes.
You’ll love this next step – it’s time to personalize your site with a professional looking header image…and I’ll show you how to do it using all free tools!
Get all the steps in the How to Start a Blog series in one book!
