
If you’ve gotten this far you’ve made your way through all kinds of new tasks from choosing a niche to installing WordPress.
That’s a huge accomplishment and you should be so proud of yourself!
Despite having come all that way it’s this next task that can seem so intimidating – and yet the most exciting – for all bloggers.
It’s time to conquer WordPress by publishing your first website post.
If you’re a little worried about putting your own writing online I get it.
I was petrified to hit the publish button when I first started. I’m actually a bit of a shy homebody who doesn’t like attention.
Thinking that people might judge me when they read my work kept me from moving forward for longer than I wish it had.
What I know now is that no one is going to see your work right away so that publish button should not intimidate you.
You can always edit what you’ve created or even unpublish it if you decide you want to work on it some more.
Your only goal right now is just to get that first post out of the way and then do a happy dance right there in your room all by yourself.
You’re going to be so happy to get that first one out of the way and it’s going to make all the rest of the posts you publish become that much easier.
You get past this point and you are on the golden path to being an actual blogger!
Come Up with Your Topic
Make it simple
You first need to decide on a topic for your post.
Posts are not books. You don’t want to cover such a broad topic that it would take thousands and thousands of words to completely cover the subject of your post.
You want to keep things narrow and right about one thing or idea or project or concept at a time.
If you go too broad then what the heck will you write about in the future?
So start small and keep it simple.
For your first post you might write about:
- Why you created your website
- The last project you completed related to your niche
- What you love about your niche
- How you became interested in your niche
Brainstorm a list of ideas and then choose one.
Creating the Post in WordPress
Tackling the post editor
The current version of WordPress uses Gutenberg blocks in the post editor.
Gutenberg blocks let you nsert text, images, embed videos, and reorganize your content more easily than you could before.
To create a new post:
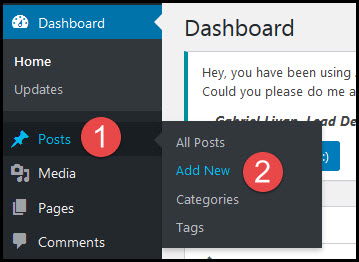
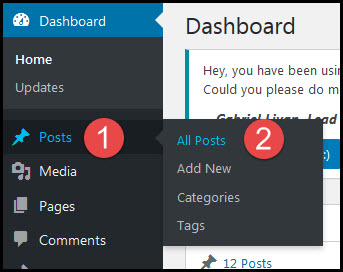
Go to Posts/Add New in your WordPress dashboard:
Enter a title for your post in the title field. Keep the title short – no more than 5-8 words is ideal. You want the title to be clear about what the post is about:
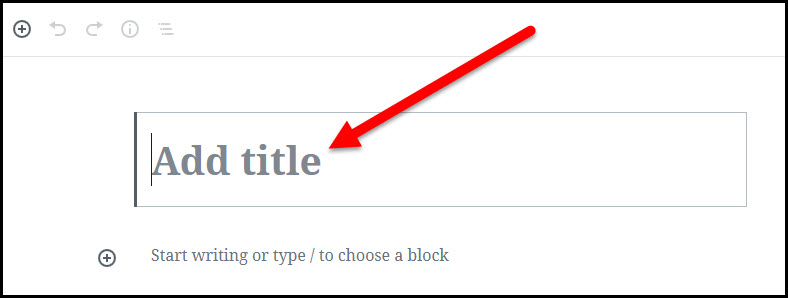
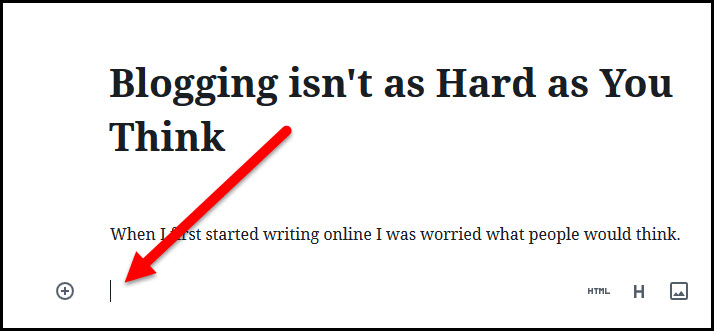
Put your cursor in the “Start writing or type / to choose a block” field:
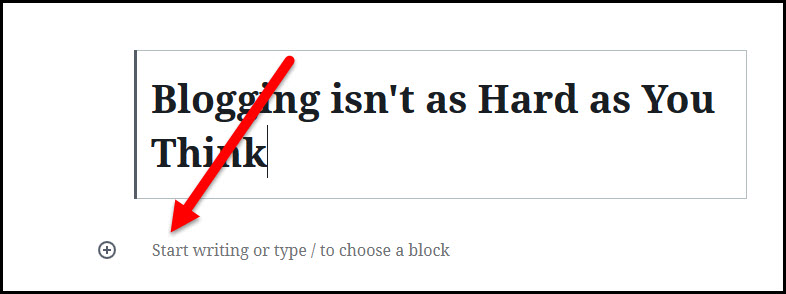
Start writing.
When you click the return key on your keyboard the editor will automatically add a new paragraph block so you can continue typing:
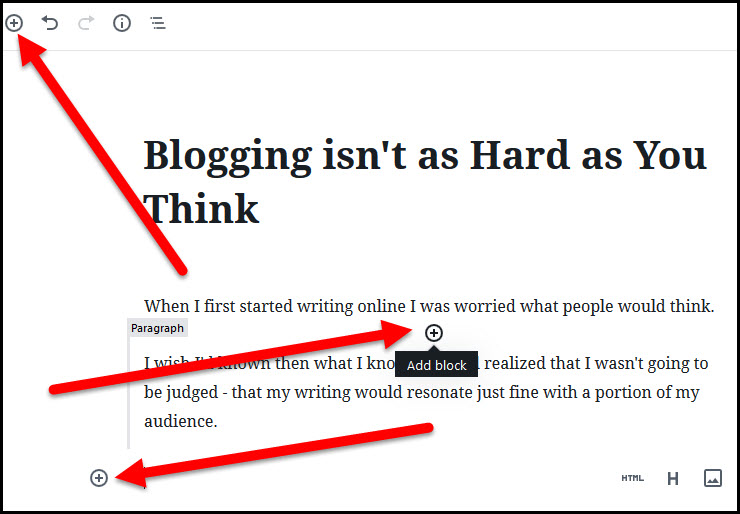
If you want to add an image to your post click on the + sign in front of an empty block, or the + sign in between blocks, or the + sign in the upper left corner of the screen:
You can choose from a number of available blocks. The Paragraph block is for written content. Add an Image block if you want to upload an image to put in your post. Choose a List block if you want to add a bulleted list.
Explore the blocks to help you add and format your post content.
Click the Save Draft link periodically to save your work:

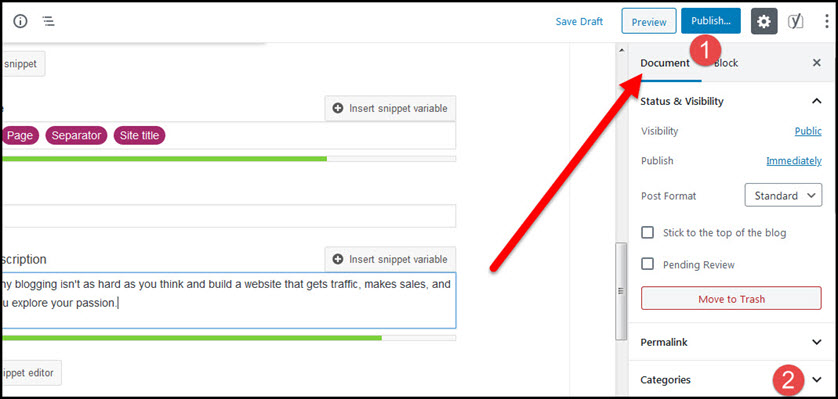
When you’re done writing the content for your post scroll down and click the Edit Snippet button:
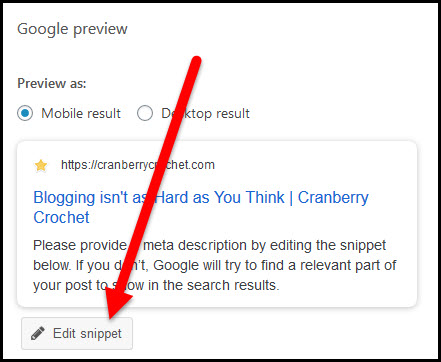
The snippet is your post’s meta description. It’s the text that will show under the post title in search results.
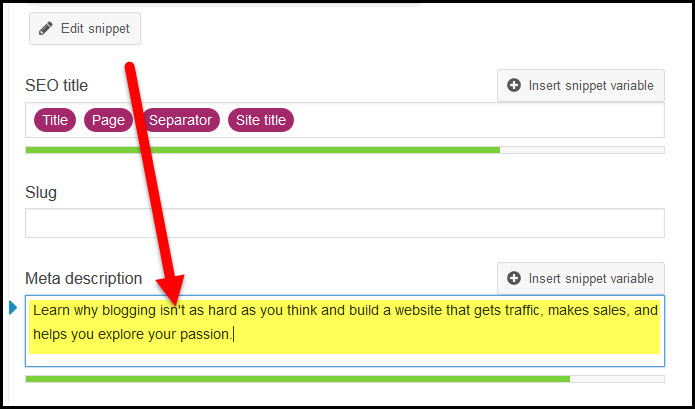
Think of meta descriptions as your free advertising in Google. You want your meta description to be about 120-160 words long. It should attract searchers to want to click on YOUR link in search results among all the other results a searcher sees.
Make it interesting so that people WANT to click on your link.
Write your snippet in the “Meta description” box below the Edit Snippet button:
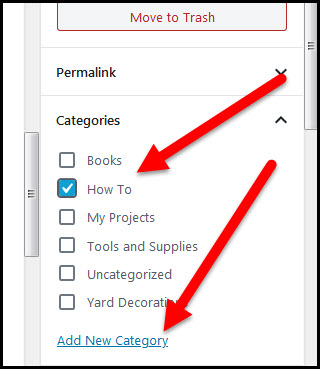
Click the drop down arrow for the Categories setting in the right sidebar:
Check the box for the category that best suits the post topic or click the option to add a new one if needed:
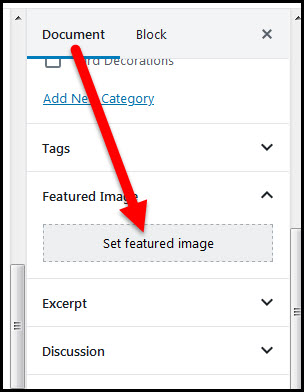
If you want to show an image next to the post title on the home page of your site click the Set Featured Image button in the Document tab on the right sidebar:
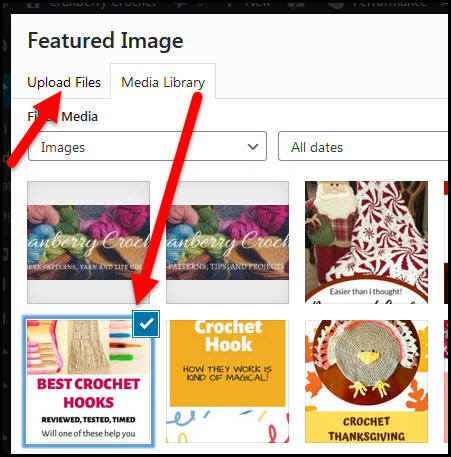
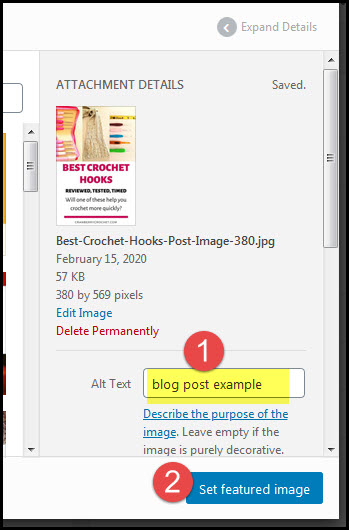
You can either upload a new photo to your site as the Featured Image or select one already in your uploaded media library:
Write a short description of what is shown in the image in the “Alt text” field (alt text will show when the image can’t be displayed or on readers designed for those who can’t see).
Then click the Set featured image button:
Check the Preview button to see what your post will look like when it’s published:
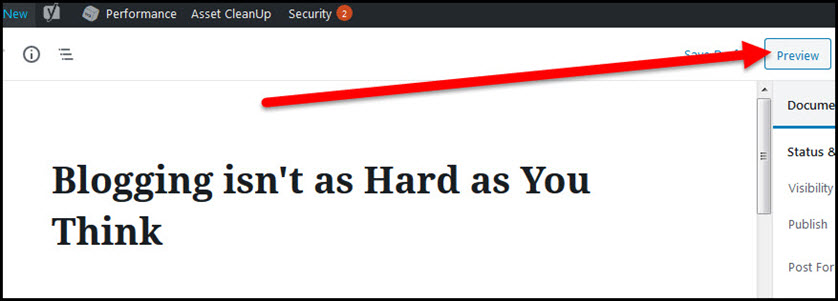
Some themes embed the Featured Image inside the post content. If you chose an image already inside your post as the Featured Image you may see that image twice in the post. If that’s the case edit your post content to remove the one that was placed with a Gutenberg block and leave the Featured Image as-is.
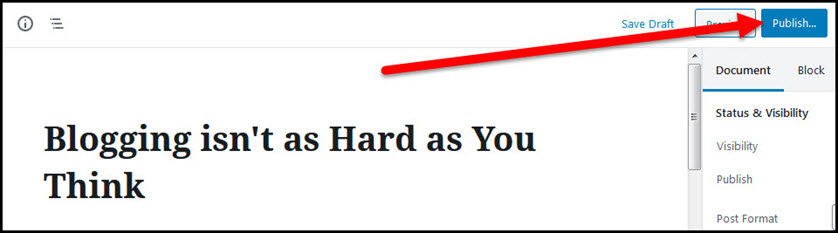
When you’ve finished the post click the Publish button:
Click the Publish button again to confirm you want to make the post go live:
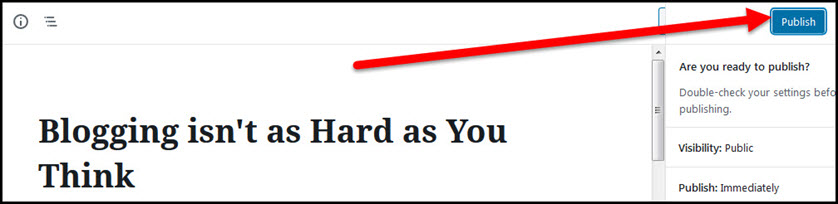
Do it! Click that button!
Check the live view of your site and you should find your published post.
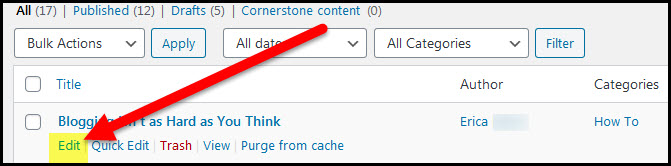
Any time you want to edit your post you can go to Posts/All Posts in your WordPress dashboard:
Hover over the name of the post and click the Edit link underneath:
You did it! Your first post is live! (Remember to do that happy dance!)
What’s next? You might want to learn how to make money with your website.